Sketching mist streams in the Canadian Rockies

I’ve not long returned from a trip to the Canadian Rockies, where the mountains rise high in truly awesome splendour. I managed around a hundred sketches, many in watercolour, and the hot, sunny weather made it really a pleasure to be out sketching. Luckily I had some bad-weather days as well, even some snowfall, and this gave my work that added atmosphere: when you can see everything there is no mystery.

Canadian Rockies

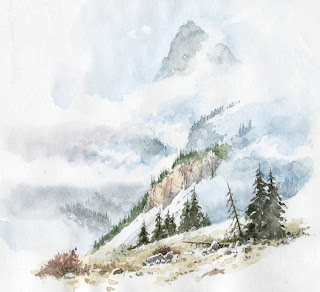
This watercolour of Stoney Squaw Mountain near Banff was done on a cartridge sketchbook, showing fresh snow and wreaths of mist, which many find difficult to tackle. If you use copious amounts of water and keep your edges soft (sometimes you need to soften edges that have dried hard with a damp brush). Obviously experience with the wet-into-wet technique helps here, and you may well need to re-wet some areas to create misty shapes of crags, trees and ridges.

One of the great advantages of the colour sketch over a photograph in a situation like this is that you usually find the camera will record simply stark contrasts of dark rock and white snow, losing any sense of colour, unless strong light is highlighting  any colour. When sketching, observe carefully any colour present in rocks and vegetation, even exaggerating it if necessary, to avoid the work looking too cold or sombre.

I can’t wait to get going on some enormous compositions of the Canadian scenes.

Rescuing a watercolour that’s gone adrift

I’m afraid things have been quiet on the blogging front lately as I’ve been in the Canadian Rockies for the past few weeks, painting some truly stunning scenery, and this will be the subject of a forthcoming blog.

This post covers the tricky subject of how you rescue watercolours that have gone slightly awry, or perhaps have somehow spectacularly misfired. It happens to us all. Many folk think you have to tear up the wayward masterpiece, but many watercolours can be effectively rescued even when they appear to be something of a disaster. I’ve just produced a DVD on the subject, and this covers a whole variety of techniques you can use to put things right, or simply alter a composition where you feel the need for change.

Mountain Bothy

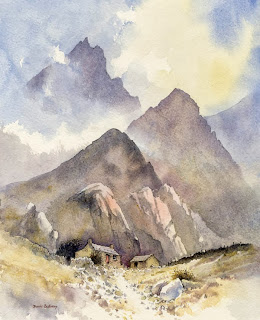
On the left you see one of my old watercolours that I discarded years ago as I didn’t like the finished treatment: the peaks were too repetitive, the edges too hard, and the atmosphere didn’t really convince me. I felt I’d made a mess of it. When I was persuaded to do a rescues DVD I thought this would be a good lesson for illustrating methods of changing a scene.

Unlike a recent painting, over time it becomes more difficult to sponge out details and passages, but I have the advantage that most of my watercolours are carried out on Saunders Waterford paper, one of the most robust watercolour papers on the market, so I could really work hard into the paper. I also rarely use the manufacturers’ greens, preferring to mix my own, which are less staining and therefore easier to remove. Because of the hard-edged striking shapes of the peaks in this painting I realised that I would have to completely change the format to a landscape one and not include those strident peaks.
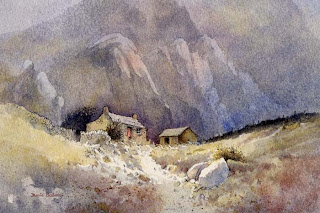
Mountain Bothy 2

My first task was to reduce the background by heavy sponging with plenty of clean water, then subduing it further with a transparent glaze of French ultramarine and a little cadmium red. This had the effect of creating a misty distance, cooler in temperature. By placing some shadow across the foreground it emphasised a lighter patch in front of the bothy, and while this was still wet I dropped in some Indian red to warm up the immediate foreground. Thus, the cool background and warm foreground suggested greater space and distance, and the buildings stand out more.

Copies of the Rescue Watercolours DVD, available for the first time this month, are available from my website  If you have any old watercolours lying around that haven’t quite worked, or have encountered a mistake you’d like to rectify, then there are many techniques on the DVD which will help improve your work. Some of the techniques are also useful to employ as a deliberate method to create special effects. There is nothing worse than finishing a watercolour only to find there is a niggling little problem to which your eye is drawn time and time again, when in fact there are almost certainly ways of solving the issue.

A bump in the road

Every now and again our plans are thrown off course and we have to adapt to the new circumstances. In April I suffered one such ‘bump in the road’,  a slipped disc and I ended up in hospital. At the same time I was given the news that I need a major operation for an unrelated issue this summer so I have had to cancel all my demonstrations and events for the foreseeable future. I am sorry if any of these cancellations have affected you. I may not be accompanying David at his events either and will miss seeing old and new friends. but I hope to be back on course again by the autumn.

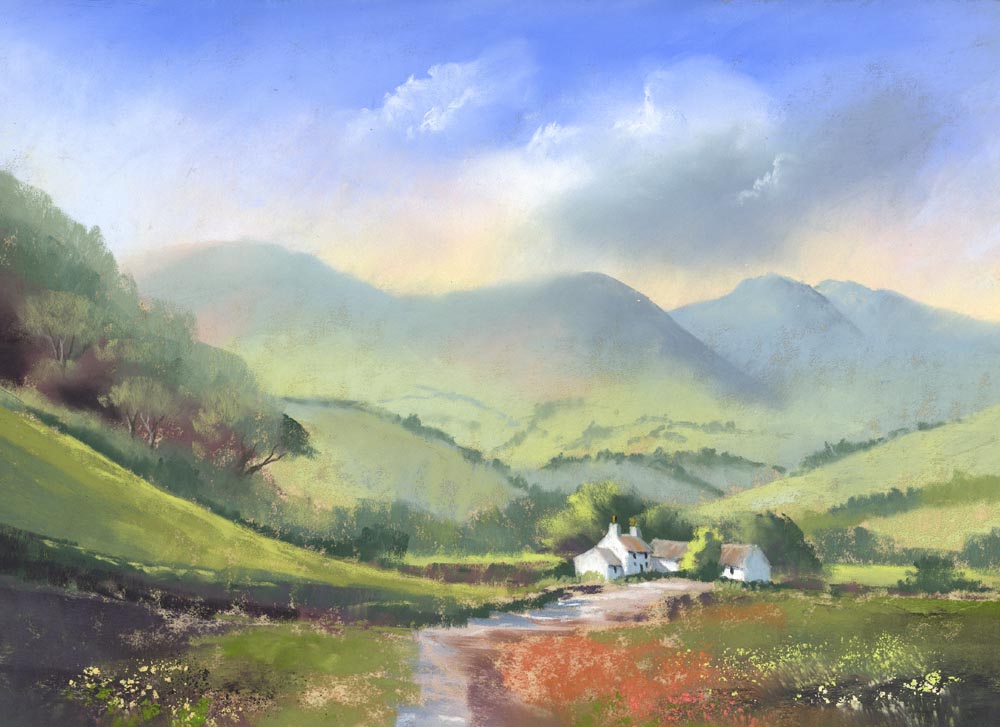
The pastel painting below was the last demonstration I did this year, for Llantarnam Grange Art Group in Cwmbran in March. The theme was ‘creating atmosphere’ and pastel is the ideal medium for this purpose. Softening the edges of the distant features in order to create a sense of atmosphere is relatively simple with pastel. To create this effect of clouds over the hilltops, just gently stroke some of the sky colour down over the distant hills. This pushes them into the distance.

Crickadarn

Crickadarn, Mid Wales, Pastel by Jenny Keal

The same method was used lower down in the distant hills, softening the green colour of the lower slopes into the blue/grey. This softness is emphasized by making the edges of the focal point sharper and the tones darker. All these techniques help to create the illusion of recession in a painting.

You can see this technique and many others, demonstrated in live action on my DVD, Painting with Pastels, available in our online shop.

I hope you find time to get out in the countryside this summer to paint and sketch and store up subjects for the coming winter months. Nature has a way of invigorating and at the same time restoring tranquility in our busy lives.

Painting Landscapes in Pastel

Autumn in the Clydach Gorge

Autumn in the Clydach Gorge by Jenny Keal

Although I work in watercolour, I do some painting in other mediums, one of which is pastel. I have neglected it for many years and keep promising myself to do some more, especially when I see what Jenny is producing these days. If you find watercolour difficult, or maybe you are in a rut at the moment, why not try pastels? They make a wonderful change, and you can always return to watercolour later. Many artists find pastel painting so much easier, but some don’t like the dust and mess on their fingers.

Jenny has excellent ways of managing pastel dust and the mess on your fingers, and she is only too willing to show you her methods. She has superb techniques for creating areas of tranquil water with reflections and sparkling highlights. On the right you see one of her paintings of the Clydach Gorge with reflections in deep water. Pastel, with its rich colours, is excellent for autumnal scenes, which can at times be tricky in watercolour, especially when you want to juxtapose light yellow or orange foliage against a darker background. The medium is also much more forgiving – you can alter features fairly easily compared to watercolour. Pastel is also great for fading away the more distant features, as you can see here.

One of my favourite subjects is rocks, and I’ve just seen Jenny’s latest works on rocks, and they certainly have the WOW! factor. Check out Jenny’s blog where she gives free tips, but if you’d really like to give pastels a try why not enroll for her course in Lynmouth from 20th to 23rd May, when she’ll be showing students how to paint the stunning coast and countryside of North Devon?

Painting less for more effect

Cotswold Cottage

Cotswold Cottage

One of the most thorny problems confronting the painting tutor is putting across the need to eliminate unwanted detail from a subject when the student has already been told to work directly from the subject and produce a careful rendering of the scene. As landscape artists we go out into the countryside to seek out visual material to work from and use as a basis for a composition, yet in order to produce an interesting painting we need to filter out a lot of extraneous detail. I am not interested in producing a photographic response to a scene where everything is laid out meticulously.
In this view of a cottage you will see that certain edges have been lost – there is no defining line for the bottom of either the house wall or the drystone wall, as this approach provides a more painterly response, rather than a photographic one. Also the stones are only described in a minimalistic way. In both these cases the eye of the viewer will subconsciously include these elements. An effective method here is to splash in a different colour in lieu of detail – note the patch of red to the left of centre. This can be a useful device even if the colour you apply does not appear in the scene, as it can both enliven a subject and avoid the need for too much detail.

For these stones I used a number one rigger brush – a very fine instrument with long hairs, ideal for fine work. Where I describe a number of stones in a wall I tend to ease off on the pressure where I want the stones to become lost, but another method I employ is to draw in a few more stones than I actually need, again with the rigger. Whilst these are still wet I then wash over the edge of the painted stones with one of the colours found in the wall, thus losing some of the stones at the edges, and at the same time creating a gradual losing of the detail that can appear more natural. An interesting exercise you can do is to paint the same scene twice: once in extremely strong detail all over the composition, and then again in the manner I’ve described above. By comparing the two results you will learn much about restricting the urge to include everything in a painting.