Sketching on Skye

David and I have just returned home from a trip to Skye. We stayed with Rosemary Hale in Aird of Sleat at her lovely coft house for a few days and for me it was sketching heaven with traditional buildings in every direction against a backdrop of mountains and islands.

Cottage on Skye

Half Seventeen in Aird of Sleat where we stayed with Rosemary

There were so many scenes to sketch that I had to work very quickly. In these circumstances I often create outline sketches in the field so that I can capture more compositions, and add watercolour washes to these in the evenings. That way I have plenty of material to work from when I return home and return with a feeling of having done justice to the plethora of subjects.
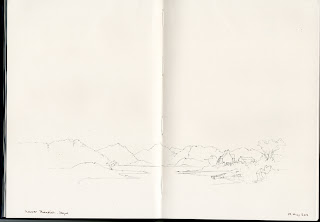
Sketch on Skye

Lower Breakish, Sketch done out of doors in about 10 minutes

Watercolour Sketch

Lower Breakish, Watercolour washes added the same evening

By adding the watercolour washes to the sketch the same evening, the colours are still fresh in my mind. Sometimes I make colour notes on the pencil sketch to remind me. Working this way I can produce 5 or 6 sketches a day instead of just one. This sketch was done on a walk along the shore at Lower Breakish.

Towards the end of our stay on Skye we spent a couple of nights with Helen Stephensen at her superb Bed and Breakfast, Sealladh Alainn,  in Lower Breakish. The views from the breakfast table across the Loch were stunning with subjects to draw and paint in every direction.
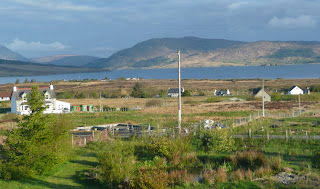
Sealladh Allain

View from the breakfast table at Sealladh Alainn

David and I are both demonstrating at Patchings Art Festival on 14th and 15th June. Come along and say hello to us there.

How much water?

I’m sure you’ll all agree that water is a pretty important ingredient in the act of watercolour painting, yet the way some people paint you might wonder if there is a permanent drought. How much water should you use? This, of course, varies considerably, depending on what you are actually trying to achieve. The traditional watercolour wash is a very fluid mixture: a liquid pool of colour which can be of varying colour intensity that is easily applied with a large brush.

In this scene, which depicts mainly sky, the whole sky area was first washed with clean water, then, without pause some weak Naples yellow was painted above the white central area, and gamboge slightly to the right and lower down. I immediately followed this with a mixture of French ultramarine and cadmium red across the top of the sky, down the sides and over the bottom, sitting back to watch these colours blend into each other.
At the critical moment when the whole sky began to dry I then applied a stronger wash of the same mixture across the top of the sky to form the darker clouds. There was much less water mixed into this application as I didn’t want it to run, or cause unsightly runbacks. I then moved lower down to suggest the more shapely clouds, still using the stronger mixture, but by now the sky was drying rapidly, which suited me as I wanted these strands of clouds to hold their shape. At this point I also rendered the background forest with the same colour mix to retain a sense of unity and atmosphere, the last applications of this being a fairly dry mixture with little water. Experience will tell you how much water to use, as it also depends on the ambient drying conditions, so practice these wet-in-wet and fluid wash techniques on scrap paper to improve your skill with watercolour.
   The painting is one of many from my new book, Skies, Light & Atmosphere, published by Search Press in June. It contains a wide variety of landscapes and how they are affected by these elements, including how to create interesting skies, the magic of shafts of sunlight, creative use of light and shadow, how to make the most of reflected light, losing mountain ridges in mist, and so much more. If you order the book from our website you can get a special offer with my new DVD on the same subject: this illustrates a few basic techniques for creating interesting skies, light and atmosphere, and has a wide selection of paintings and sketches with commentary on how the effects were achieved.

Sketching peculiar characters

It’s been rather wet here lately, bucketing down at times, but I haven’t been able to get out much to take advantage of such atmosphere because of too many deadlines. Sunshine is marvellous for walking and sketching, but the countryside has such glories to show us, whatever the weather. Rain can be quite stimulating, and of course you never know who you’re going to meet on the hills – this chap was clearly enjoying himself, and was well equipped for the conditions.

Whether it was his wife’s frilly pink parasol, or his own, I cared not, though the sharpened pole might have caused concern amongst some. Had I not ventured forth into the Alpine monsoon I’d have missed this glorious spectacle, and naturally my sketchbook was quickly whipped out and the vital aspects of the figure rendered on paper that became rather wet after only a few moments.

I have to hand it to these characters, allowing themselves to be seen with such outlandish accessories. Over the years I’ve accumulated many books of sketches of this more outgoing type of person, a wonderful antidote for those rainy days when you are stuck indoors feeling miserable when your sketching/painting/bog-snorkelling or pancake tossing efforts have gone slightly astray. A small A6 sketchbook, a soft pencil and a few quick lines is all it takes to capture the important points, and the image can be embellished later.

I shall be demonstrating watercolour painting for PONTERWYD & DISTRICT ART CLUB at Syr John Rhys School Hall, Ponterwyd, in Ceredigion between 7 and 9pm on Wednesday 6th June. You are welcome to come along – there is a charge for non-members and information is available from Jenny Dee on 01970 890664

Direct sunlight bleaching out detail in trees

Capturing sunlight effects in watercolour can be a magical, though sometimes a little less than magical experience, depending on the result. One effect that many artists ignore is that of the sunlight burning out the detail of branches when you look directly into a low sun, yet it can enhance a landscape immeasurably. Usually we observe it only when it intrudes on our scene as backlighting towards sunset, but it is easy enough to go out on a sunny evening and seek out a suitable example.

  Looking directly into the sun can be dangerous to your eyes, so wear dark glasses and don’t look right into the sun. If you use a camera be sure you don’t look at the sun through the lens. Staring into bright light for any length of time can be extremely uncomfortable and cause spots before the eyes, so if you are keen on capturing this effect then keep your gaze away from the brightest part of the sunlight, making sure you are fully protected with sunglasses.
This scene is detail from one of the paintings in my forthcoming book Skies, Light & Atmosphere, and you can see how the strong direct sunlight has bleached out the ends and parts of branches, while at the same time turning them to red and gold. It also has the effect of weakening the strength of tone in the affected parts. Most of this effect was achieved with a fine sable brush – a number 2 or 3. Try out the effect of changing colour and strength of tone on scrap paper, and with a little practice you’ll find it won’t be too difficult a technique to master. Ease the pressure off the brush as you describe the branch, moving outwards from the trunk.
Skies, Light & Atmosphere covers a wide range of landscape subjects and will be available in early June. There is an associated DVD of the same name, available exclusively from our website or at my demonstrations and courses. Watch out for our special offer on the book and DVD

Making the most of stunning light effects

Jenny and I have just returned from a tour of demonstrating in Yorkshire, to a number of really enthusiastic art societies who gave us a marvellous welcome, as indeed they usually do in Yorkshire. In between we managed some walking, sketching and visiting people. Lovely weather, of course, that is, until we went out sketching and walking!

This scene of stunning evening light we came across in Wharfedale as we were driving along, the stormy sky emphasising the brightness of the incredibly strong light. Rather like a snow scene with a dark sky, watercolourists would normally paint the sky after rendering the light hillside, but how would you cope with such a sharp edge all the way across the composition?

The answer is actually in the photograph if you examine it closely. On the extreme left-hand side the light does not actually reach the topmost part of the hill – a thin slither of the upper section lies in shadow, and you can accentuate this by making the shadow area larger and having a shadow tone about halfway between the dark sky and the light part of the hill. Then again, on the right-hand side the hill-top is in darker shadow, creating counter-change with the lighter sky above it. The larger right-hand tree also breaks up the background line very effectively. It’s an extremey useful exercise to consider these things when you are presented with interesting features, and take photographs and sketches even if they don’t give you a completely satisfactory composition. You can always use the effects in another scene.