David Bellamy – Painting figures in action

Drawing and painting figures is always fascinating, whether to include in a landscape painting, as subjects in themselves, or in a fantasy context as you will see below. Life drawing is easily the best way of learning to draw the figure, though this may hardly be necessary if you are simply wishing to add a few tiny figures into a wide open landscape. I love drawing figures, especially action ones, really doing something interesting, and much of the time these tend to be humorous.

This is a small part of one of the illustrations from my children’s book Terror of the Trolls, where several trolls are gorging themselves – one is eating a leg of some sort, the one on the left is warming his feet in the soup, and the third is flat out after a heavy drinking session. Getting people to pose for these activities was not a real problem, though some of the more gymnastic poses in other parts of the book did rather leave me scratching my head! Note here how you cannot see the whole body of any one troll, and this makes it look more natural, especially in non-fantasy situations. Try to have your figures relating to each other, and not there just to ‘fill the gap’. Back-ground figures can remain as silhouettes, thus throwing the emphasis more onto the main figures.

One especially effective technique that occurs repeatedly in this scene is that of creating soft edges. This not only lends atmosphere, but suggests depth and distance as one sharp-edged feature will come forward, in front of the softer-edged one. Terror of the Trolls is the second book of the Llandoddie tales and is available from our website

Last night Jenny and I enjoyed the Erwood Station Craft Centre Christmas Party, where the lovely Lorraine King entertained us with her wonderful repertoire of songs. It was a wild night (outside!), and in addition to the bridge being closed, three other roads were cut off by fallen trees, so it was a wonder that so many folk attended, having hiked over hill and vale or probably coracled across the Wye. Nothing stops the Erwood Station Stompers! It closes for Christmas and re-opens on 14th February.

Jenny and I thank all of you who have sent in so many kind messages over the last year, and wish you and your families a very Happy Christmas wherever you live, and may your painting give you many moments of great pleasure and success in 2014

David Bellamy – Painting woodland scenes in watercolour

My last blog featured autumn trees, and as it’s such a good time to be working on trees I’ll follow it up with summer trees which can be adapted for autumn trees if necessary. Woodlands are great places at this time of year when the autumn mists create fascinating, soft backgrounds. Even in sharp visibility I tend to make woodland backgrounds less harsh as it adds a sense of mystery and simplifies the composition.

Woodland trees

This is part of a painting of a beechwood and you will see that I’ve given a different treatment to each of the three main tree-trunks. The right-hand tree was painted in while the background was still damp, and this included the foliage as well as the trunk. The soft, cool colour suggests distance. When the paper was dry I painted in the middle tree-trunk onto dry paper. The sharper edges tend to bring it closer, yet there is still no detail on the trunk. Finally the closest tree has been made larger and with strong detail and dark tones, thus really bringing it forward. I’ve also made use of the dead leaves of the previous winter lying on the ground, to enhance the warm foreground and hence push the rest of the scene into the distance.

The complete painting can be seen at Erwood Station Craft Centre, with several others. I shall be demonstrating there on Saturday 23rd November from 2pm to 4pm, on how to rescue watercolours that have not quite worked, and how to improve parts of a painting with which you may not be happy with. The cost of the demo is £7 which will be donated to the Welsh Air Ambulance. Erwood Station lies beside the beautiful River Wye, about 8 miles south of Builth Wells, and is a lovely place to explore, stop for tea and refreshments and walk some of the footpaths. At the moment Erwood bridge is closed, so you either need to approach the centre from the north via the B4567, or if coming from the south cross the Wye at Boughrood bridge and drive northwards with the Wye on your left. Ring 01982 560674 for information.

Stage 2 & 3 of my competition entry

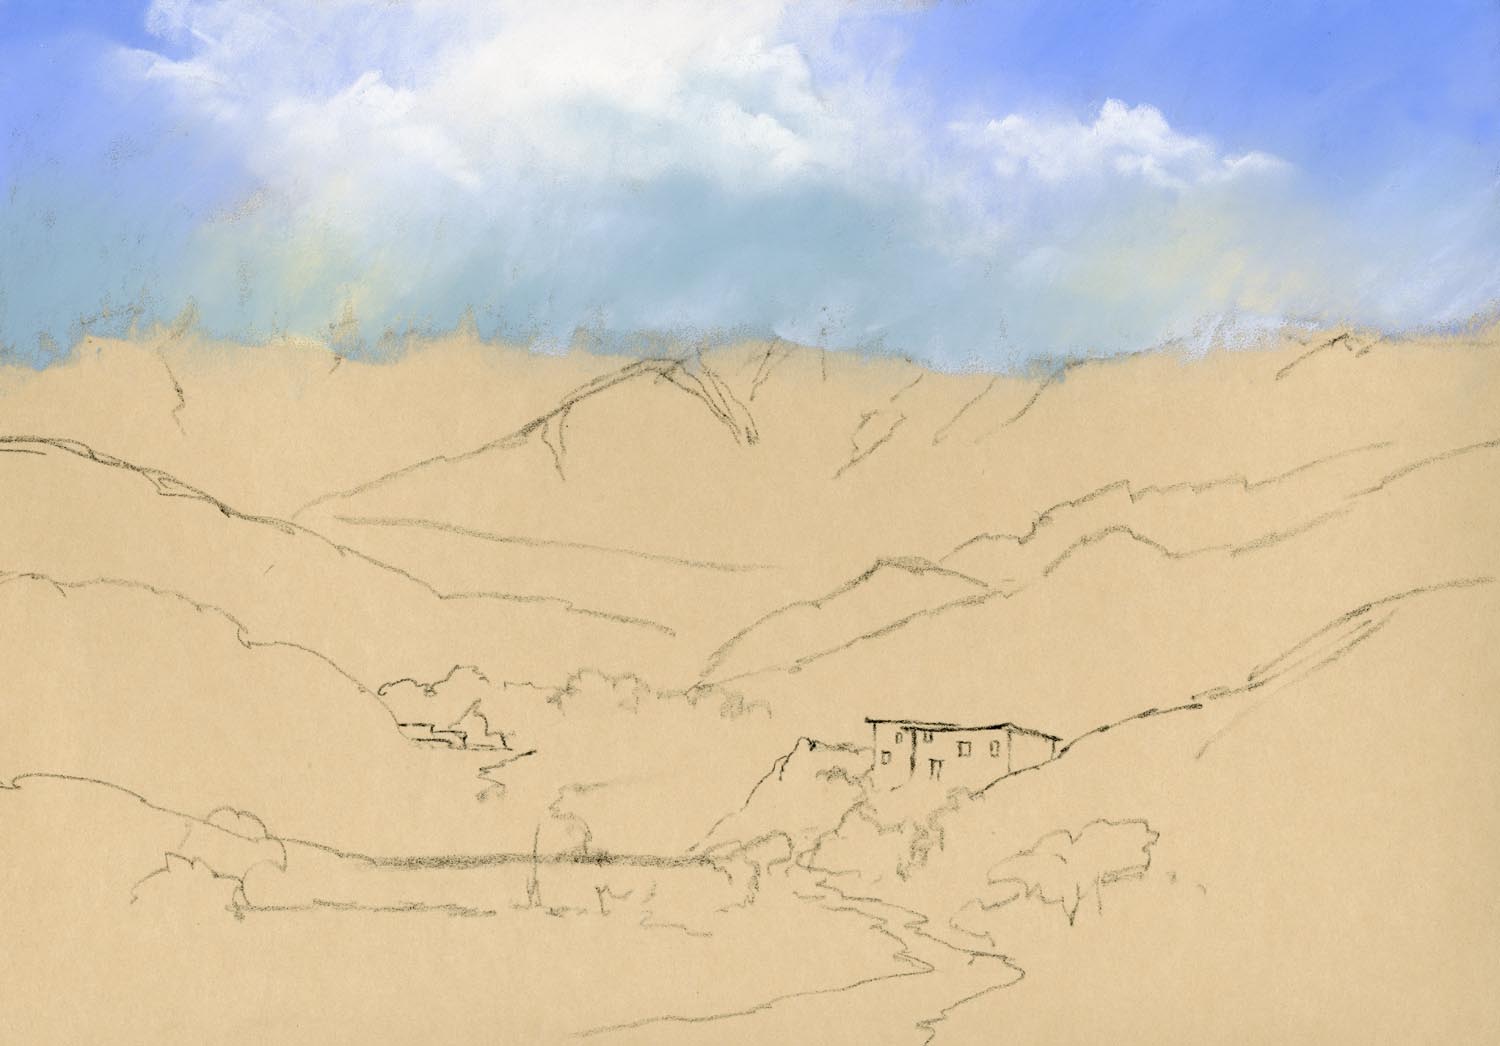
Yesterday I made more progress on my painting for the Cox & Kings Morocco competition: Stage 2 – Sky: When painting landscapes, I generally work from the top of a painting downwards. This serves two purposes. Firstly it helps prevent the heel of your hand smudging the work where it rests on the support and secondly it helps create a sense of recession. If you think of the landscape in terms of distance, the objects farthest away are usually lighter in tone, cooler in colour and less distinct. Translating this into the painting process means that you use paler, cooler colours in the distance and less detail. By working down the support you can remember that meme in your choice of colour and tone.

morocco stage2

Stage 2 – Sky

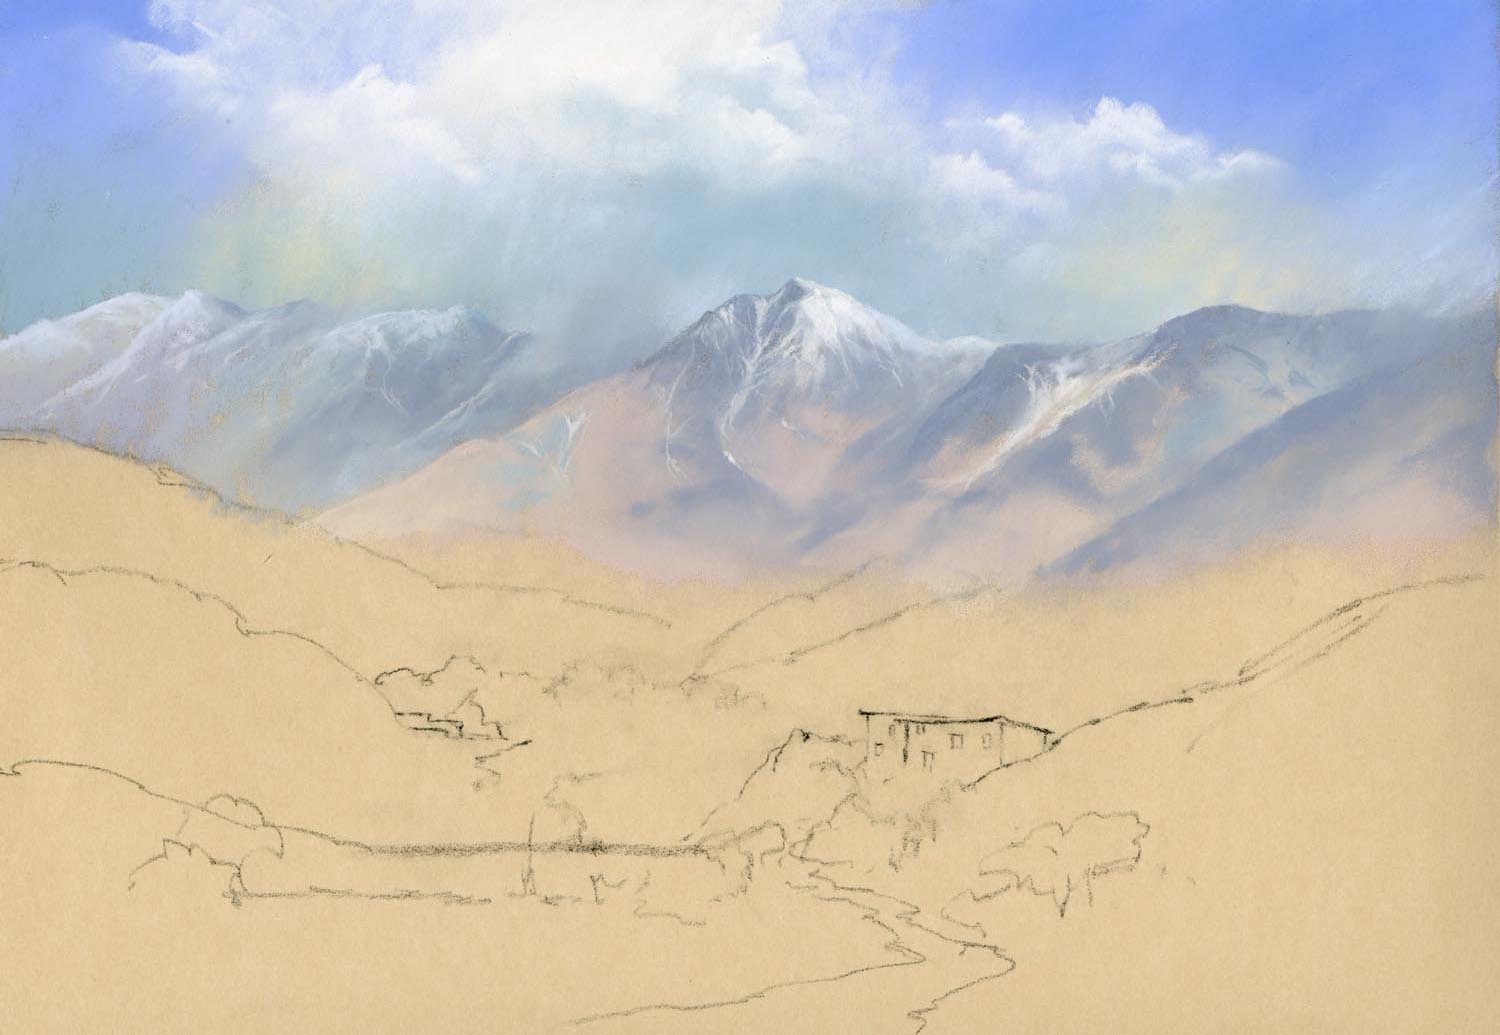
Stage 3 – The mountains: The sky was painted down over the drawn lines that defined the mountain tops. This is to ensure that there are no gaps between the sky and mountains and also to give the impression that the sky is, in effect, behind the mountains. Sticking to cooler colours and pale tones, the mountains are painted with sharp edges in places and softer edges in others so that there is not a hard line all the way across the painting. Soft edged cloud shadows helps define the ridges.

morocco stage3csm (1)

Stage 3 – the mountains

The next step will be coming soon.

Rescuing a watercolour that’s gone adrift

I’m afraid things have been quiet on the blogging front lately as I’ve been in the Canadian Rockies for the past few weeks, painting some truly stunning scenery, and this will be the subject of a forthcoming blog.

This post covers the tricky subject of how you rescue watercolours that have gone slightly awry, or perhaps have somehow spectacularly misfired. It happens to us all. Many folk think you have to tear up the wayward masterpiece, but many watercolours can be effectively rescued even when they appear to be something of a disaster. I’ve just produced a DVD on the subject, and this covers a whole variety of techniques you can use to put things right, or simply alter a composition where you feel the need for change.

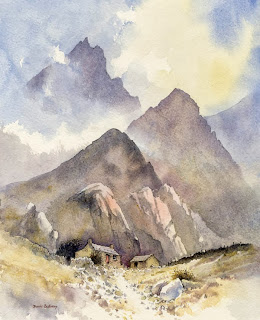
Mountain Bothy

On the left you see one of my old watercolours that I discarded years ago as I didn’t like the finished treatment: the peaks were too repetitive, the edges too hard, and the atmosphere didn’t really convince me. I felt I’d made a mess of it. When I was persuaded to do a rescues DVD I thought this would be a good lesson for illustrating methods of changing a scene.

Unlike a recent painting, over time it becomes more difficult to sponge out details and passages, but I have the advantage that most of my watercolours are carried out on Saunders Waterford paper, one of the most robust watercolour papers on the market, so I could really work hard into the paper. I also rarely use the manufacturers’ greens, preferring to mix my own, which are less staining and therefore easier to remove. Because of the hard-edged striking shapes of the peaks in this painting I realised that I would have to completely change the format to a landscape one and not include those strident peaks.
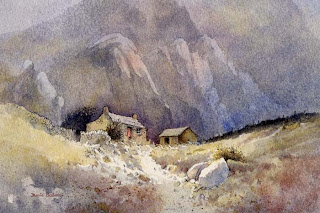
Mountain Bothy 2

My first task was to reduce the background by heavy sponging with plenty of clean water, then subduing it further with a transparent glaze of French ultramarine and a little cadmium red. This had the effect of creating a misty distance, cooler in temperature. By placing some shadow across the foreground it emphasised a lighter patch in front of the bothy, and while this was still wet I dropped in some Indian red to warm up the immediate foreground. Thus, the cool background and warm foreground suggested greater space and distance, and the buildings stand out more.

Copies of the Rescue Watercolours DVD, available for the first time this month, are available from my website  If you have any old watercolours lying around that haven’t quite worked, or have encountered a mistake you’d like to rectify, then there are many techniques on the DVD which will help improve your work. Some of the techniques are also useful to employ as a deliberate method to create special effects. There is nothing worse than finishing a watercolour only to find there is a niggling little problem to which your eye is drawn time and time again, when in fact there are almost certainly ways of solving the issue.

Using counterchange to good effect

With the current heatwave hitting the British Isles I reckon it’s rather nice to remind ourselves of those lovely cooling days of English drizzle. I’ve been working on sunny landscapes recently and will feature some in future blogs, but for the moment I’d like to discuss counterchange, an interesting feature that someone brought up recently.

Hackney

Counterchange in a landscape scene is a very effective way of adding interest to a passage or solving a tonal problem. At its simplest it could be a change in tone across a ridge, hill, forest, mountain, or any background mass to create a tonal range running from light on one side to dark on the other, while at the same time adjusting the sky in a similar way so that the dark part of the sky stands against the light part of the hill, and vice versa. In this watercolour of a cobbled street in Hackney you can see I’ve used the method vertically on the right-hand wall just to the right of the lampost.

In this instance I’ve included it for interest rather than to solve a problem. Where the method is extremely useful in solving a tonal problem can be, for example, where you have a house with a light-coloured wall set against a dark background: if the roof is dark it will get lost in the dark background, and if it is light it will lose itself against the light wall. By laying a graduated wash over the roof, darker at the bottom and graduating to a lighter top where the roof abuts the darker background, you can thus make both top and bottom of the roof stand out, thus causing a counterchange effect using the graduated wash. One of the most simple examples of counterchange can often be found on telegraph poles or winter tree-trunks where they show up light against dark vegetation at the bottom, and dark against the bright sky at the top, depending on the light of course.

This particular painting is featured in my Skies, Light & Atmosphere book available on my website with a special offer package of book and DVD, available only from the site or my demonstrations. Don’t forget to watch out for these effects in the natural landscape when you are out and about. You can learn a lot even without your painting or sketching gear!